2020-04-03 15:15:02 +08:00
# Gitlab 运维
2019-01-29 17:47:44 +08:00
2020-04-26 10:34:55 +08:00
## 一、gitlab 安装
2019-01-29 17:47:44 +08:00
2020-04-03 15:15:02 +08:00
### Gitlab 的普通安装
2019-01-29 17:47:44 +08:00
2020-04-03 15:15:02 +08:00
#### 下载
2019-01-29 17:47:44 +08:00
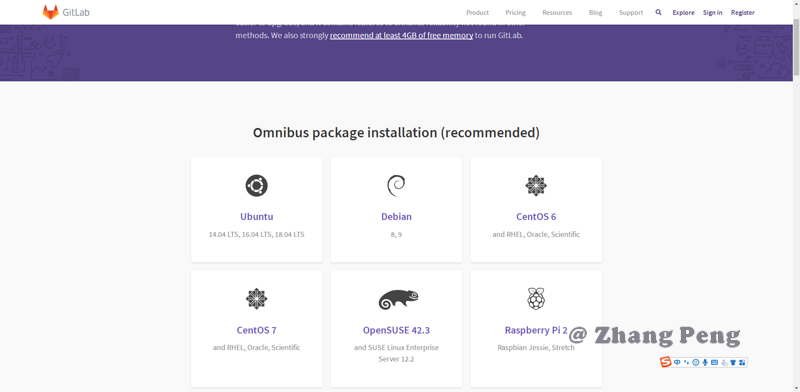
进入官方下载地址:
2020-04-03 15:15:02 +08:00
2019-01-29 17:47:44 +08:00
以 CentOS7 为例:
#### 安装和配置必要依赖
在系统防火墙中启用 HTTP 和 SSH
```
sudo yum install -y curl policycoreutils-python openssh-server
sudo systemctl enable sshd
sudo systemctl start sshd
sudo firewall-cmd --permanent --add-service=http
sudo systemctl reload firewalld
```
安装 Postfix ,使得 Gitlab 可以发送通知邮件
```
sudo yum install postfix
sudo systemctl enable postfix
sudo systemctl start postfix
```
#### 添加 Gitlab yum 仓库并安装包
添加 Gitlab yum 仓库
```
curl https://packages.gitlab.com/install/repositories/gitlab/gitlab-ce/script.rpm.sh | sudo bash
```
通过 yum 安装 gitlab-ce
```
sudo EXTERNAL_URL="http://gitlab.example.com" yum install -y gitlab-ce
```
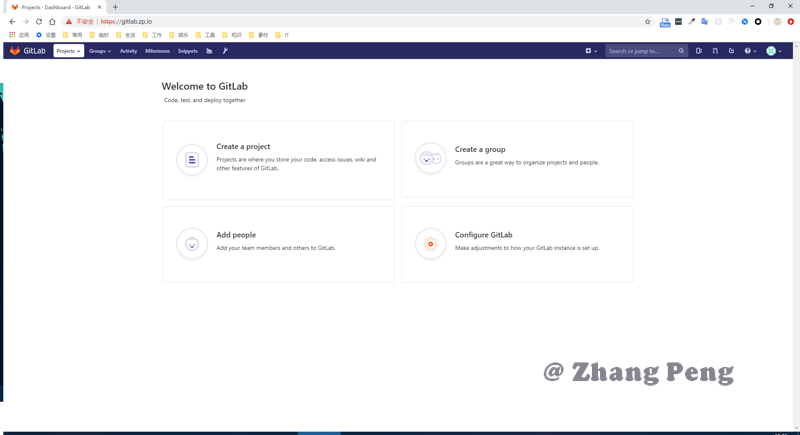
安装完成后,即可通过默认的 root 账户进行登录。更多细节可以参考:[documentation for detailed instructions on installing and configuration](https://docs.gitlab.com/omnibus/README.html#installation-and-configuration-using-omnibus-package)
2020-04-03 15:15:02 +08:00
### Gitlab 的 Docker 安装
2019-01-29 17:47:44 +08:00
拉取镜像
```
docker pull docker.io/gitlab/gitlab-ce
```
启动
```
2019-02-21 19:26:15 +08:00
docker run -d \
--hostname gitlab.zp.io \
--publish 8443:443 --publish 80:80 --publish 2222:22 \
--name gitlab \
--restart always \
--volume $GITLAB_HOME/config:/etc/gitlab \
--volume $GITLAB_HOME/logs:/var/log/gitlab \
--volume $GITLAB_HOME/data:/var/opt/gitlab \
gitlab/gitlab-ce
2019-01-29 17:47:44 +08:00
```
2020-04-03 15:15:02 +08:00
2019-02-21 19:26:15 +08:00
2020-04-28 12:07:00 +08:00
### 自签名证书
首先,创建认证目录
```
sudo mkdir -p /etc/gitlab/ssl
sudo chmod 700 /etc/gitlab/ssl
```
( )
```
sudo openssl genrsa -des3 -out /etc/gitlab/ssl/gitlab.domain.com.key 2048
```
会提示输入密码,请记住
( )
```
sudo openssl req -new -key /etc/gitlab/ssl/gitlab.domain.com.key -out /etc/gitlab/ssl/gitlab.domain.com.csr
```
根据提示,输入信息
```
Country Name (2 letter code) [XX]:CN
State or Province Name (full name) []:JS
Locality Name (eg, city) [Default City]:NJ
Organization Name (eg, company) [Default Company Ltd]:xxxxx
Organizational Unit Name (eg, section) []:
Common Name (eg, your name or your server's hostname) []:gitlab.xxxx.io
Email Address []:
Please enter the following 'extra' attributes
to be sent with your certificate request
A challenge password []:
An optional company name []:
```
( )
```
sudo cp -v /etc/gitlab/ssl/gitlab.domain.com.{key,original}
sudo openssl rsa -in /etc/gitlab/ssl/gitlab.domain.com.original -out /etc/gitlab/ssl/gitlab.domain.com.key
sudo rm -v /etc/gitlab/ssl/gitlab.domain.com.original
```
( )
```
sudo chmod 600 /etc/gitlab/ssl/gitlab.domain.com.*
```
2020-04-26 10:34:55 +08:00
## 二、gitlab-ci-multi-runner 安装
2019-01-29 17:47:44 +08:00
> 参考:
### 常规安装 gitlab-ci-multi-runner
#### 下载
```
sudo wget -O /usr/local/bin/gitlab-runner https://gitlab-runner-downloads.s3.amazonaws.com/latest/binaries/gitlab-runner-linux-amd64
```
#### 配置执行权限
```
sudo chmod +x /usr/local/bin/gitlab-runner
```
#### 如果想使用 Docker, ( )
```
curl -sSL https://get.docker.com/ | sh
```
#### 创建 CI 用户
```
sudo useradd --comment 'GitLab Runner' --create-home gitlab-runner --shell /bin/bash
```
#### 安装并启动服务
```
sudo gitlab-runner install --user=gitlab-runner --working-directory=/home/gitlab-runner
sudo gitlab-runner start
```
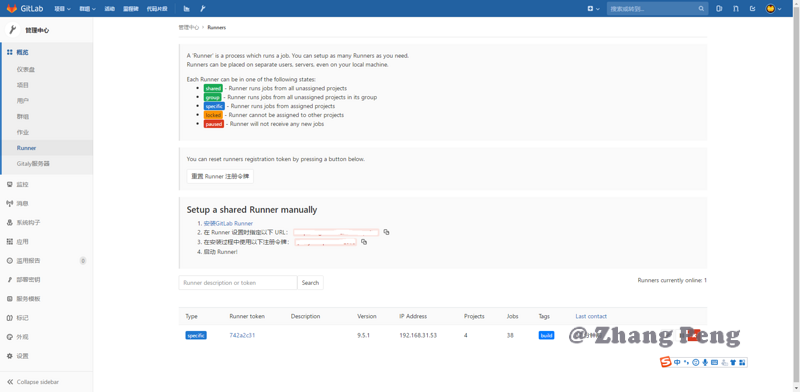
#### 注册 Runner
( ) :
```
sudo gitlab-runner register
```
( )
URL 和令牌信息在 Gitlab 的 Runner 管理页面获取:
2020-04-03 15:15:02 +08:00
2019-01-29 17:47:44 +08:00
```
Please enter the gitlab-ci coordinator URL (e.g. https://gitlab.com )
https://gitlab.com
Please enter the gitlab-ci token for this runner
xxx
```
( )
```
Please enter the gitlab-ci description for this runner
[hostame] my-runner
```
( )
```
Please enter the gitlab-ci tags for this runner (comma separated):
my-tag,another-tag
```
( )
```
Please enter the executor: ssh, docker+machine, docker-ssh+machine, kubernetes, docker, parallels, virtualbox, docker-ssh, shell:
docker
```
如果想选择 Docker 作为执行器,你需要指定默认镜像( `.gitlab-ci.yml` 中没有此配置)
```
Please enter the Docker image (eg. ruby:2.1):
alpine:latest
```
### Docker 安装 gitlab-ci-multi-runner
拉取镜像
```
docker pull docker.io/gitlab/gitlab-runner
```
启动
```
docker run -d --name gitlab-runner --restart always \
-v /srv/gitlab-runner/config:/etc/gitlab-runner \
-v /var/run/docker.sock:/var/run/docker.sock \
gitlab/gitlab-runner:latest
```
2020-04-26 10:34:55 +08:00
## 三、gitlab 配置
### 基本配置
2019-01-29 17:47:44 +08:00
```
sudo vim /etc/gitlab/gitlab.rb
external_url 'https://gitlab.domain.com'
```
#### gitlab 网站 https:
```
nginx['redirect_http_to_https'] = true
```
#### gitlab ci 网站 https:
```
ci_nginx['redirect_http_to_https'] = true
```
#### 复制证书到 gitlab 目录:
```
sudo cp /etc/gitlab/ssl/gitlab.domain.com.crt /etc/gitlab/trusted-certs/
```
#### gitlab 重新配置+更新:
```
sudo gitlab-ctl reconfigure
sudo gitlab-ctl restart
```
2019-02-21 19:26:15 +08:00
2019-05-07 19:00:47 +08:00
### 创建你的 SSH key
1. 使用 Gitlab 的第一步是生成你自己的 SSH 密钥对(
2. 登录 Gitlab
3. 打开 **Profile settings** .
2020-04-03 15:15:02 +08:00

2019-05-07 19:00:47 +08:00
4. 跳转到 **SSH keys** tab 页
2020-04-03 15:15:02 +08:00

2019-05-07 19:00:47 +08:00
5. 黏贴你的 SSH 公钥内容到 Key 文本框
2020-04-03 15:15:02 +08:00

2019-05-07 19:00:47 +08:00
6. 为了便于识别,你可以为其命名
2020-04-03 15:15:02 +08:00

2019-05-07 19:00:47 +08:00
7. 点击 **Add key** 将 SSH 公钥添加到 GitLab
2020-04-03 15:15:02 +08:00

2019-05-07 19:00:47 +08:00
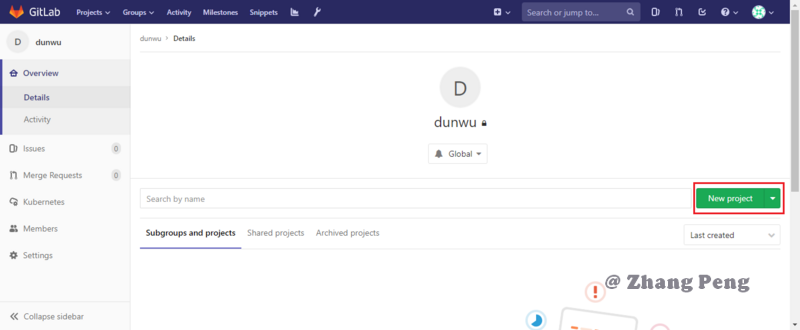
### 创建项目
2020-04-03 15:15:02 +08:00
2019-05-07 19:00:47 +08:00
输入项目信息,点击 Create project 按钮,在 Gitlab 创建项目。
2020-04-03 15:15:02 +08:00

2019-05-07 19:00:47 +08:00
### 克隆项目到本地
可以选择 SSH 或 HTTPS 方式克隆项目到本地(推荐 SSH)
拷贝项目地址,然后在本地执行 `git clone <url>`
### 创建 Issue
依次点击 **Project’ > **Issues** > **New Issue** 可以新建 Issue
2020-04-03 15:15:02 +08:00

2019-05-07 19:00:47 +08:00
在项目中直接添加 issue
2020-04-03 15:15:02 +08:00

2019-05-07 19:00:47 +08:00
在未关闭 issue 中,点击 **New Issue** 添加 issue
2020-04-03 15:15:02 +08:00

2019-05-07 19:00:47 +08:00
通过项目面板添加 issue
2020-04-03 15:15:02 +08:00

2019-05-07 19:00:47 +08:00
通过 issue 面板添加 issue
2020-04-03 15:15:02 +08:00

2020-04-26 10:34:55 +08:00
## 四、gitlab 权限配置
2020-04-03 15:15:02 +08:00
### 用户组的权限
- 用户组有这几种权限的概念:`Guest、Reporter、Developer、Master、Owner`
- 这个概念在设置用户组的时候会遇到,叫做:`Add user(s) to the group`,比如链接:`https://< gitlab_host > /< group > `
| 行为 | Guest | Reporter | Developer | Master | Owner |
| ---------- | ----- | -------- | --------- | ------ | ----- |
| 浏览组 | ✓ | ✓ | ✓ | ✓ | ✓ |
| 编辑组 | | | | | ✓ |
| 创建项目 | | | | ✓ | ✓ |
| 管理组成员 | | | | | ✓ |
| 移除组 | | | | | |
2020-04-26 10:34:55 +08:00
## 五、备份/迁移/升级
### 备份
#### 手动备份
执行 `gitlab-rake gitlab:backup:create` 开始备份全量数据,成功后,会在 `/var/opt/gitlab/backups` 下生产一个名称类似 `1585910556_2020_04_03_11.3.0_gitlab_backup.tar` 的压缩包。
### 定时自动备份
可以利用 crontab 来定时执行备份命令。
执行 `vim /etc/crontab` 或 `crontab -e` 手动编辑定时任务。
### 迁移
> 迁移前,需要确保新老机器的 Gitlab 版本号一致。
将备份的压缩包拷贝到新机器的备份路径下(默认为 `/var/opt/gitlab/backups` )。
2020-04-28 12:07:00 +08:00
( ) , ,
2020-04-26 10:34:55 +08:00
```shell
chmod 777 1585910556_2020_04_03_11.3.0_gitlab_backup.tar
```
( )
```shell
gitlab-ctl stop unicorn
gitlab-ctl stop sidekiq
```
( )
```shell
# gitlab-rake gitlab:backup:restore BACKUP=备份文件编号
gitlab-rake gitlab:backup:restore BACKUP=1585910556_2020_04_03_11.3.0
```
### 升级
升级前,一定要做好备份,记录当前 gitlab 的版本号。
第一步还是使用官方命令进行升级。
```shell
sudo yum install -y gitlab-ce
```
如果下载速度理想,就无需手动升级安装。不理想就需要`停止自动更新`,并手动下载安装包
访问官方地址,下载对应`版本`,对应`系统`的安装包。
注:可以根据`自动升级时下载的版本`,选择对应文件。
```http
https://packages.gitlab.com/gitlab/gitlab-ce
```
安装包手动上传至服务器,并`替换`下载未完成的安装包。下面是升级缓存地址:
```
/var/cache/yum/x86_64/7/gitlab_gitlab-ce/packages/
```
再次执行官方升级命令即可完成自动安装。
2020-04-28 12:07:00 +08:00
## 参考资料
2019-05-07 19:00:47 +08:00
2020-04-03 15:15:02 +08:00
- 官网:
- 中文网:
- 官网下载:
- 官网安装说明:
2020-04-26 10:34:55 +08:00
- [操作系统、运维部署总结系列 ](https://github.com/dunwu/OS )